Article Duplicate

ancient roman sculpture

Summary

Renovating or restoring a condo in South Florida can feel like opening a mystery box—you never know what you’re going to get. One of the biggest triggers of lawsuits in restoration projects isn’t necessarily bad workmanship or shady contractors, but good old-fashioned cost overruns and change orders. In this blog, I’ll explain why these issues are so common in concrete restoration, why engineers aren’t fortune-tellers, and what boards and property managers can do to minimize the fallout.

Why Cost Overruns Happen So Often in Concrete Repair

If you’ve ever been involved in a renovation or restoration project, you know this story: you start with one budget, and somewhere along the way, that budget explodes like a piñata filled with unexpected bills. In South Florida, lawsuits are practically a pastime when it comes to construction disputes, and concrete repair is a common culprit.

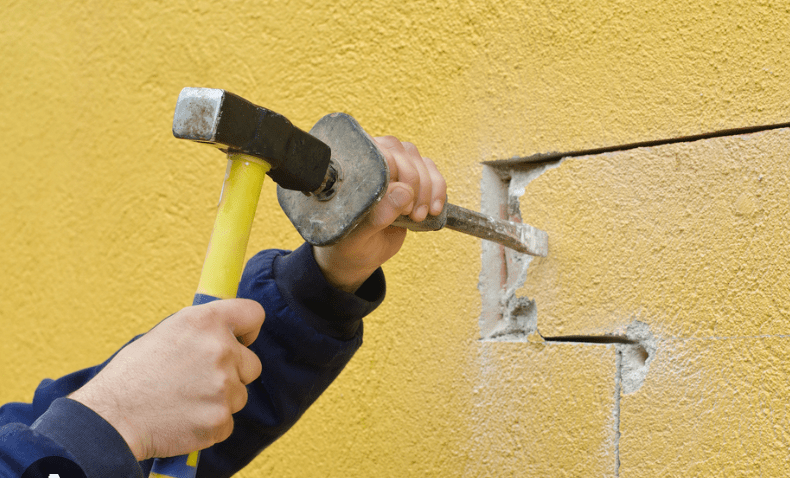
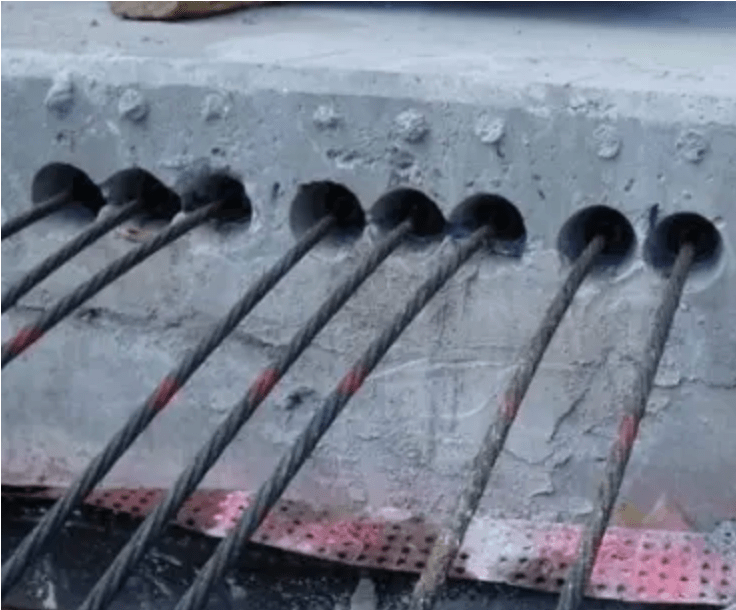
Why? Because unlike new construction, where you’re working with a clean slate, restoration means dealing with hidden conditions. Engineers don’t have X-ray vision (although I wish we did). What we see in our inspections is only the surface. Once work begins and contractors start chipping away at concrete, they might find steel so corroded it looks like rusted rebar spaghetti, or wood supports where there should have been reinforced concrete.

Let’s compare:

  • New construction surprises usually mean soil conditions or underground utilities. Those can be bad, but at least we usually have soil borings and utility maps to guide us.
  • Restoration surprises mean everything hidden behind walls, under slabs, or inside columns. These are often discovered only once the jackhammers start pounding.

When the budget jumps, people get angry—understandably so. The owners or board members are footing the bill, and nobody enjoys unexpected costs that hit the pocketbook. But the reality is, in restoration, the risk of these hidden conditions is sky-high compared to other types of construction.

And once lawyers get involved—and they often do—contracts get tested, blame gets tossed around, and suddenly the engineer, the contractor, and the project manager are all wearing bullseyes on their backs.  I’m reiterating here that lawyers are not a bad thing.

The Top 3 Causes of Overruns and Change Orders

1. Hidden Conditions

This is the number one reason costs balloon. In concrete restoration, we engineers inspect, tap, and test, but we can’t see every crack that lurks beneath the surface. Spalling (that cancer-like process of concrete breaking away from rusting rebar inside) grows geometrically over time. A small patch visible today could mean a much larger patch lurking behind it.

When bidding, contractors use the quantities shown in the engineer’s plans. But if once the work begins, the actual spalls are far more extensive, the cost skyrockets. Boards and managers should plan ahead by adding a contingency (often 15–20%) to the budget to account for hidden conditions. It won’t stop the surprise, but at least you’ll be financially better prepared.

2. Underestimated Quantities

This one is related to hidden conditions but slightly different. Quantities of repair are based on inspections that are inherently limited. Engineers try their best with sounding, coring, and other testing methods, but we can only probe so much before the building starts looking like Swiss cheese.

Underestimation doesn’t mean engineers are careless—it’s simply the nature of the beast. If we call out 1,000 square feet of spalling and once the job starts it’s 2,500, that’s not fraud; it’s just reality. One way to minimize the sting is to do more thorough pre-bid investigations and destructive testing, though that costs more upfront. It’s a trade-off that boards need to carefully consider.

3. Change Orders

Change orders are the sworn enemy of every board treasurer. They often go hand-in-hand with underestimated quantities but can also arise for entirely different reasons. For example, during a concrete repair job, a new board might decide to replace all the windows or install new sliding glass doors. Suddenly, the contract balloons because the scope of work has changed.

Not all change orders are bad. Sometimes they’re necessary to comply with updated codes or to address issues uncovered mid-project. But when they’re avoidable (like deciding halfway through to upgrade all the glass railings), they’re costly and disruptive. The best mitigation? Lock down the scope of work before the project starts and resist the temptation to add shiny extras in the middle of construction.

Honorable Mentions

  • Material escalation: Tariffs, supply chain issues, and inflation have driven up costs of steel, concrete, and aluminum significantly.
  • Contractor performance: Concrete repair is specialized, and skilled crews are limited. Poor workmanship or slow production can drive costs up even more.

What Can Be Done to Minimize Cost Overruns?

Here’s what I recommend:

  • Budget for contingencies: Boards should always set aside 15–20% for hidden conditions.
  • Invest in detailed pre-bid inspections: Spending a little more upfront for testing may save you from massive surprises later.
  • Lock down the scope early: Avoid scope creep by finalizing all big decisions (windows, railings, etc.) before bidding.
  • Communicate clearly: When surprises arise, explain them transparently to owners. Anger often comes from not understanding why something happened.

And remember: I’ve been part of hundreds of projects over the years. Breaking the bad news to boards is never fun. My heart goes out to volunteer board members who take on this mostly thankless job—until big-money issues surface. That’s when friendships and neighborly goodwill can evaporate, sometimes leading to lawsuits.

True Story to Learn From

Several years ago, I worked on an 18-story beachfront condo in South Florida. It was your typical reinforced concrete building with countless balconies. Midway through the project, the owner decided to buy new sliding glass doors for all the units. Seemed simple enough.

But when we did the mockup, we discovered something bizarre: decades ago, someone had installed false columns made of wood to hold the sliding doors in place. Yes, wood. On a high-rise. Facing the ocean.

According to the Notice of Acceptance (NOA)—that’s the approval document Miami-Dade and Broward use to certify that products meet hurricane and building code standards—sliding glass doors on a high-rise in South Florida should be attached to concrete. The solution? Tear out all the fake wood columns and replace them with formed and poured concrete columns. Incredibly expensive.

Could someone have sued me for not spotting this earlier? Possibly. But the glass doors weren’t even part of the original contract; they were added later. The bigger lesson was this: scope out the job thoroughly at the beginning, because every surprise down the line adds cost, frustration, and risk.

Different Perspectives

Some argue that contractors or engineers should guarantee quantities upfront, absorbing the financial risk of hidden conditions. While this sounds attractive to boards and owners, in practice it doesn’t work. No engineer can predict the full extent of spalling without fully demolishing the structure beforehand—which defeats the purpose. Contractors who take on too much risk will pad their bids heavily, meaning you’ll pay more from the start.

Others claim that change orders are just profit-padding. While bad actors exist in every industry, most legitimate change orders come from real, unforeseen issues. Dismissing all change orders as scams risks jeopardizing the safety and compliance of the project.

Bibliography

Source: American Concrete Institute (ACI 562-19), Code Requirements for Assessment, Repair, and Rehabilitation of Existing Concrete Structures.
Source: Florida Building Code, 8th Edition, Existing Building provisions.
Source: Florida Statutes Chapter 558, Construction Defects.
Source: Miami Herald coverage of Surfside and subsequent building safety regulations.
Source: U.S. Bureau of Labor Statistics, Producer Price Index for construction materials.

For additional information you can access the following:

Concrete International Magazine (ACI) – www.concrete.org

Engineering News-Record (ENR) – www.enr.com

Why Tall Buildings Are Meant to Sway in the Wind

image of swaying buildings

Summary

When it comes to skyscrapers, rigidity is the enemy. Engineers actually design tall buildings to sway during high winds — a counterintuitive but necessary approach to keep them standing. In this blog, I’ll explain why stiffness can be dangerous, the pros and cons of flexible design, and the clever methods engineers use to make residents more comfortable. I’ll also share the story of the infamous John Hancock Tower in Boston and how engineers resolved its sway problem, along with lessons from Taipei 101.

Why Engineers Design for Movement

If you’ve ever stood at the top of a tall building during a storm and felt it sway, you might have wondered: “Shouldn’t this thing be rock solid?” The answer: no, and thank goodness it isn’t.

Rigid buildings don’t dissipate energy well. When hurricane-force winds or seismic loads hit, a stiff building risks cracking or even catastrophic failure. Flexibility allows the structure to absorb and release energy safely (American Society of Civil Engineers, ASCE 7-22).

Think of it like palm trees during a storm. A stiff oak might snap, but palms bend and survive. Skyscrapers are the palms of the built environment.

The Pros and Cons of Building Flexibility

Pros

  • Safety: Prevents catastrophic structural failures.
  • Durability: Flexibility reduces long-term cracking and material fatigue.
  • Code Compliance: Modern building codes (including Florida Building Code) require sway allowances.

Cons

  • Motion Sickness: Occupants can feel the sway, especially on upper floors.
  • Psychological Discomfort: People expect buildings not to move — even when it’s normal.
  • Design Complexity: Engineering sway solutions requires specialized modeling and costly construction features.

In South Florida, where high winds are part of life, engineers carefully balance these tradeoffs.

Techniques to Reduce the Feel of Sway

Engineers can’t eliminate sway, but they can reduce the feeling of it. Some tactics include:

  • Tuned Mass Dampers: Giant counterweights that move opposite the sway to steady the building (like in Taipei 101).
  • Outrigger Systems: Structural beams that tie the building’s core to exterior columns for added stiffness.
  • Aerodynamic Shaping: Rounded corners or notched designs that reduce wind pressure.
  • Window Design: Covering or shading windows so occupants don’t visually track the building’s movement.

These approaches don’t make the building perfectly rigid — they just make the ride smoother for those inside.

Famous Case Study: The John Hancock Tower

Let’s step away from Florida for a moment and talk about Boston’s John Hancock Tower.

When it opened in the 1970s, it quickly became famous for the wrong reason. The 60-story tower swayed so much in the wind that people on the upper floors felt seasick. Some even reported furniture sliding across rooms. To make matters worse, massive glass windows began popping out and crashing to the streets below.

The solution was complex: engineers added tuned mass dampers — giant weights that counteracted the sway — and retrofitted the glass. Over time, the fixes worked, but not before the building became a cautionary tale for structural engineers worldwide.

Another Marvel: Taipei 101

On the other side of the world, Taipei 101 tackled sway head-on. The 1,667-foot skyscraper includes a 660-ton tuned mass damper — a golden sphere suspended between floors near the top. When the building sways in typhoon winds or earthquakes, the damper swings in the opposite direction, balancing the movement.

The damper isn’t hidden away, either. Visitors can actually see it, which reassures them that the sway is not only expected but also controlled.

True Story to Learn From

Now, let me bring it back home to South Florida.

I once had a client in Miami who bought a penthouse condo in a new high-rise. After the first tropical storm of the season, she called me in a panic. “Greg, my chandelier was swaying last night! Is my building safe?”

I explained that yes, the building was safe — it was designed to sway. But explaining “safe sway” to a nervous resident takes some finesse.

We walked through the building’s design: its wind bracing, dampers, and compliance with the Florida Building Code. Then I told her about Taipei 101’s damper, adding: “If they can make a skyscraper in Taiwan dance with a 660-ton pendulum, your condo can handle a tropical storm.”

She laughed, and I could see the relief on her face. The next time her chandelier swayed, she texted me: “Greg, I think my condo is dancing.” Mission accomplished.

Different Perspectives

Some argue that skyscrapers should be built to eliminate sway altogether. While that sounds comforting, it’s structurally dangerous. A perfectly rigid building would snap under hurricane winds — a fact supported by wind engineering studies (National Institute of Standards and Technology, NIST, 2012).

Others believe occupants should simply “get used to it.” But ignoring comfort creates unhappy residents, complaints, and even legal disputes. That’s why engineers design not only for safety, but also for human psychology.

The balance is key: buildings must sway, but people must feel safe while inside them.

FactorTypical Measurements / StatisticsExplanation
Wind Pressure on Tall Buildings~1–2 kPa (kilopascals) on building facades during strong winds; hurricane winds can exceed 3–4 kPaWind pressure increases with wind speed and height.
Sway at Top of Tall BuildingsHigh-rises are designed to sway 0.1%–0.25% of their height.
• 200 m building → 20–50 cm sway
• 400 m skyscraper → 40–100 cm sway
Engineers allow controlled movement to prevent structural damage.
Human Comfort ThresholdSway causing accelerations above 15–20 milli-g (0.015–0.02 g) becomes uncomfortable for many occupantsCross-wind motion is typically more noticeable than along-wind.
Natural Frequency of SkyscrapersUsually 0.1–0.5 Hz (one oscillation every 2–10 seconds)Tall buildings are intentionally flexible and have long vibration periods.
Vortex Shedding FrequencyFor rectangular tall buildings: often 0.1–1 Hz, depending on wind speed and building widthIf this matches a building’s natural frequency, it can amplify sway.
Tuned Mass Damper EffectivenessCan reduce lateral motion by 30–50% in strong windsLarge weights (hundreds to thousands of tons) counteract sway.
Soil Flexibility ContributionSoft soil can increase lateral drift by 10–30% compared to bedrock foundationsFoundations interact with the ground during wind motion.

How Do I Know If a Crack on the Building Is Harmless or Dangerous?

COLUMN-PUNCHING-SHEAR

Summary

Not all cracks are created equal. Some are harmless cosmetic blemishes, while others can signal serious structural issues. In this blog, I’ll walk you through the different types of cracks, how engineers evaluate them, and why certain patterns — like punching shear cracks — can pose real dangers. I’ll also share a true story from a multi-story parking garage in South Florida where a few “harmless-looking” cracks turned out to be something far more serious.

Why Cracks Happen in Buildings

Let’s start with the obvious: all buildings crack. Concrete shrinks as it cures, temperature swings make materials expand and contract, and Florida humidity does things to concrete that even seasoned engineers wish it wouldn’t.

Cracks can come from:

  • Shrinkage: Hairline cracks often form as concrete cures. They’re usually shallow and cosmetic.
  • Settlement: If the soil under a building shifts, it can cause uneven stress and cracks. Florida’s sandy soil and high water table don’t always play nice.
  • Overloading: Put too much weight on a slab or a column, and cracks appear like wrinkles after a stressful week.
  • Structural Weakness: This is where things get serious — cracks radiating out from columns or wide, deep cracks in slabs can be a sign of major stress.

Not every crack means danger, but the ones that do often follow recognizable patterns.

Harmless vs. Dangerous Cracks

The trick is knowing which is which.

Harmless Cracks

  • Hairline cracks in plaster or stucco.
  • Thin, straight shrinkage cracks in slabs.
  • Small cracks (less than 1/16 inch) that don’t change over time.

These are usually cosmetic — annoying but not threatening. A little patch and paint, and you’re back in business.

Potentially Dangerous Cracks

  • Diagonal cracks across beams or walls.
  • Wide cracks (greater than 1/8 inch) that keep growing.
  • Radiating cracks from the base of columns or around slab-column joints (possible punching shear).
  • Rust-stained cracks, which suggest corroding rebar inside.

In Florida, where salt-laden air accelerates corrosion, cracks that show rust streaks are especially concerning (American Concrete Institute (ACI 224R-01)).

Think of it like this: a crack is the building trying to tell you something. The question is whether it’s whispering (“Don’t worry, I’m just settling”) or screaming (“Help, I’m failing!”).

How Engineers Inspect Cracks

When I get a call about cracks, here’s how the inspection usually unfolds:

  1. Visual Inspection:
    We measure crack width, length, and pattern. Cracks that radiate outward from a column or spread like spiderwebs often raise red flags.
  2. Monitoring:
    We sometimes install crack gauges or take photos to track whether cracks are moving or widening over time.
  3. Structural Modeling:
    For serious cases, we model the building in software like ETABS or SAFE. This helps simulate the loads and identify whether the cracks are related to punching shear, flexural stresses, or settlement.
  4. Core Samples & Testing:
    In extreme situations, concrete samples are taken for lab testing to see if there’s deeper deterioration.
  5. Florida-Specific Checks:
    Coastal structures may suffer chloride intrusion, which corrodes rebar. In those cases, cracks aren’t just surface blemishes — they’re highways for saltwater straight to the steel.

Repair & Reinforcement Options

Once dangerous cracks are identified, engineers recommend solutions depending on severity:

  • Epoxy Injection: For small but significant cracks, epoxy can restore strength by bonding the concrete together.
  • Structural Reinforcement: Adding drop panels, steel plates, or jackets to strengthen overstressed columns or slabs.
  • Replacement: In extreme cases, demolishing and recasting the affected portion of the structure.

In Florida, we often choose reinforcement plus waterproofing to protect against future salt and humidity damage.

True Story to Learn From

Let me take you to a multi-story parking garage in a coastal South Florida city.

A condo board called me after residents noticed long, narrow cracks radiating outward from the base of several columns in the garage. At first glance, they seemed harmless — hairline thin, no spalling, no rust. Some board members shrugged it off, suggesting a little patching and paint.

But when I walked the garage floor, alarm bells went off in my head. These weren’t just random cracks. They were radiating outward from the columns like spokes on a wheel — classic signs of punching shear.

Punching shear occurs when the slab around a column is overstressed, and the cracks radiate out like the lines on a shattered dinner plate. If left unchecked, this kind of failure can be catastrophic.

I told the board, “We need to take a closer look. This isn’t just cosmetic.”

We modeled the garage in structural software to simulate the loads. Sure enough, the analysis showed that three of the columns were carrying more stress than they should. Without reinforcement, those cracks could have worsened and led to a serious safety hazard.

The solution? We reinforced those critical columns with drop panels — thickened slabs around the column heads designed to spread the load and reduce stress. Once installed, the cracks stopped progressing, and the structure was safe again.

The board president admitted later: “We thought you were exaggerating at first. But if we’d ignored this, who knows what could have happened.”

This story had a happy ending — but only because the cracks were recognized for what they were: warnings, not blemishes.

Different Perspectives

Some contractors argue that all hairline cracks are harmless and don’t require engineering evaluation. While that may be true for shrinkage cracks in a driveway, it’s not true for structural cracks in slabs and columns. Research by the Federal Highway Administration shows that crack patterns can be a reliable indicator of structural stress and deterioration (FHWA, 2019).

Others say that visual inspections are enough and software modeling is “overkill.” But in practice, modeling can uncover stress concentrations invisible to the naked eye. In the parking garage case, modeling was the key to discovering which columns needed reinforcement and which were safe. Without it, repairs might have been misdirected or delayed.

See the table below for a Harmless versus Dangerous Cracks comparison table.

AspectHarmless CracksDangerous Cracks
AppearanceHairline, straight or shallow surface marksDiagonal, wide, or radiating from columns/slabs
LocationPlaster, stucco, or non-structural concrete surfacesStructural members (columns, beams, slabs, parking garages)
Width< 1/16 inch (1.5 mm)> 1/8 inch (3 mm) or widening
ProgressionStable, do not grow over timeExpanding or multiplying with time
Risk LevelLow – usually cosmetic onlyHigh – may indicate serious structural stress or failure

Why Post-Tension Cables in Buildings Can Be Dangerous

POST-TENSION-CABLES

Summary

If you’ve ever lived in or managed a concrete building in Florida, you’ve probably heard the term post-tension cables. These powerful steel strands give strength to concrete slabs, but they can also pose serious dangers if neglected or damaged. In this blog, I’ll explain what post-tension cables are, why engineers use them, and the risks they carry. I’ll also share a true story from a South Florida building where a corroded cable snapped in the middle of the night — and what happened next.

What Are Post-Tension Cables?

Let’s start simple. Concrete is strong in compression (it can hold up a car without flinching), but weak in tension (pull it apart, and it cracks faster than a fortune cookie). Engineers solved this problem with reinforcement — first with rebar, and then with post-tension cables.

Definition

Post-tension cables are bundles of high-strength steel strands that run through ducts in concrete slabs. After the concrete hardens, the strands are tensioned (stretched tight) and anchored at their ends in stressing pockets. The result? A slab that can carry much heavier loads and span longer distances than regular reinforced concrete.

Visualizing It

Imagine a stretched rubber band held tight between your fingers. The rubber band wants to pull your fingers together, and that “pre-load” keeps the system firm. Post-tensioning works the same way — except instead of your fingers, it’s thousands of pounds of concrete.

A typical post-tension system includes:

  • The Strand: The steel cable itself.
  • The Duct: A sleeve or path inside the slab where the strand sits.
  • The Anchorage/Stressing Pocket: The end location where the strand is tightened and secured.

Why Engineers Use Them

So why bother with these steel “guitar strings” inside a building?

  • Longer spans: Great for parking garages, bridges, and condos without forest-like columns.
  • Thinner slabs: Saves material and cost.
  • Crack control: Reduces shrinkage cracks in concrete.
  • Stronger structures: Helps resist heavy live loads like vehicles or crowds.

In South Florida, where developers love wide-open parking garages and open floorplans, post-tension is practically everywhere particularly in newer buildings.

Why Post-Tension Cables Can Be Dangerous

Here’s the catch: a post-tension cable is a loaded spring hiding in your ceiling.

The Risks

  • Sudden Failure: If a strand snaps, it releases stored energy violently. That’s the loud “bang” residents sometimes hear.
  • Concrete Damage: The cable can punch through slabs, spall concrete, or drop debris.
  • Corrosion: Florida’s salty air and high humidity corrode steel fast. Rust at the stressing pocket can eventually cause strand failure (ACI 423.7R-05).
  • Accidental Cuts: Contractors drilling into slabs without scanning first can cut a cable. The result? Expensive repairs, dangerous recoil, and liability headaches.

Who Should Be Careful

  • Homeowners/Residents: Report rust stains, cracks near stressing pockets, or unexplained bangs.
  • Property Managers: Schedule regular inspections and preventative maintenance.
  • Engineers/Contractors: Always scan for post-tension cables before coring or drilling.
  • Everyone: Never assume “that little rust spot” is harmless.

True Story to Learn From

One night in a coastal South Florida city, a condo resident woke up to a loud bang in his living room. Startled, he ran out to find chunks of concrete on the floor. Even worse, a steel cable was sticking out of his ceiling.

When I arrived, I knew exactly what I was looking at: a broken post-tension strand.

At first, we suspected someone might have been drilling through the slab above. But after inspection, we realized the truth. The end of the cable at the stressing pocket had corroded, weakened by years of salt exposure. Rust stains had been visible on the outside of the building, but nobody acted on them. Eventually, the steel gave way, and the strand snapped under pressure.

The condo board brought me in to investigate further. What we found was sobering: not just one bad cable, but around 50 others with corrosion issues. We were hired to analyze, design, repair and replace them.

Thankfully, this story had a happy ending. The building was stabilized, residents were safe, and management finally understood the importance of proactive maintenance. But the situation could have been much worse — imagine if that failure had happened in a crowded living room or during a holiday gathering.

How to Spot and Prevent Problems

Signs of Trouble:

  • Rust stains near slab edges or stressing pockets.
  • Loud bangs followed by concrete cracks.
  • Unexplained ceiling cracks or spalling.
  • Exposed steel visible on the slab exterior.

Precautions:

  • Schedule regular inspections by licensed engineers.
  • Use ground-penetrating radar (GPR) before drilling into any slab.
  • Seal stressing pockets and protect exposed ends from saltwater intrusion.
  • Educate residents to report strange noises or cracks immediately.

Different Perspectives

Some contractors argue that post-tension cables are “perfectly safe” if installed correctly and maintained. And in many cases, they are. But in Florida’s coastal environment, the real enemy is time + salt air.

Others claim that simple patching of cracks near stressing pockets is sufficient. Unfortunately, research shows that once corrosion begins, it can progress rapidly inside the anchorage (Federal Highway Administration, FHWA, 2018). Ignoring it just delays the inevitable. The truth lies in the middle: post-tension cables are powerful tools when respected, inspected, and protected. But neglect them, and they become hazards hiding in plain sight.

ComponentDescriptionVisual Analogy
StrandHigh-strength steel cable that is tensioned to reinforce the slabLike the string of a guitar pulled tight
DuctSleeve or pathway in which the strand sits inside the concreteLike a straw guiding the string through the concrete
Anchorage / Stressing PocketThe end location where the strand is stressed (tightened) and securedLike the tuning peg of the guitar holding the string
Concrete SlabThe hardened concrete that holds the post-tension system in placeLike the guitar body keeping everything together

Why Roofing Is the Most Dangerous Job in Construction

roofers-in-fall-protection

Summary

Roofing may look straightforward — lay down materials, keep the rain out. But it’s actually the most dangerous job in construction. Falls account for the largest portion of roofing-related deaths, and many of these happen because workers aren’t properly tied off or because of simple slips. OSHA has strict rules to help reduce these accidents, but in Florida and beyond, too many tragedies still occur when those rules are ignored.

The Reality of Roofing Risks

When most people think of dangerous jobs, they picture firefighters or deep-sea divers. But according to the U.S. Bureau of Labor Statistics, roofing has one of the highest fatal injury rates of any construction trade (BLS, 2022).

The reasons are obvious once you think about it:

  • Roofers work at height almost every day.
  • Roofers work with hot asphalt and other toxic chemicals and fumes.
  • Surfaces are often sloped and slick with morning dew or rain.
  • Florida’s strong winds and unpredictable storms only make matters worse.
  • And sometimes, workers skip safety measures to save time — a shortcut that can turn deadly.

The Occupational Safety and Health Administration (OSHA) estimates that falls account for more than one-third of all construction deaths (OSHA, 2023). For roofers, falls make up the overwhelming majority of fatalities.

How Falls Happen

Falls don’t always come from dramatic mistakes. More often, they happen because of ordinary oversights:

  • Not being tied off: Workers failing to use harnesses or lanyards.
  • Unprotected edges: Missing guardrails or incomplete parapets.
  • Slips and trips: Loose gravel, wet surfaces, or clutter left behind.
  • Swinging loads: Cranes and hoists can swing unexpectedly in high winds.
  • Improper ladder use: Falls don’t always happen on the roof — ladders are a major hazard.

In South Florida, where weather changes fast, sudden gusts of wind or afternoon rain showers only raise the stakes.

OSHA’s Rules for Roofing Safety

OSHA has strict standards to prevent falls, many of which are basic common sense:

  • Fall Protection: Harnesses, lifelines, and anchor points must be provided and used.
  • Guardrails: Required at roof edges and openings.
  • Safety Nets: Used when guardrails or harnesses aren’t practical.
  • Training: Workers must be trained to recognize fall hazards.
  • Housekeeping: Roof surfaces must be kept clear of debris and materials.

OSHA’s motto is simple: “Plan, provide, train.” Plan ahead for safety, provide the right equipment, and train workers to use it.

And yet — despite these rules being clear and widely published — roofing still tops the list for fatal accidents.

True Story to Learn From

Let me take you back many years to a high-rise project in Puerto Rico.

I was working as an assistant superintendent. The building was still under construction, and the parapets at the roofline weren’t fully installed yet. That meant there were open sections — holes where, if someone wasn’t careful, they could fall right through.

That morning, the tower crane was lifting roofing materials up to the crew. A gust of wind blew through, and the load on the crane began to sway. One of the bundles swung just enough to hit a roofer standing near the opening in the parapet.

He wasn’t tied off.

In an instant, he was knocked off balance and fell through the gap. Twelve stories down. He didn’t survive.

It was one of the most terrible days of my career. Not only because of the loss itself, but because the accident was preventable. Later, we had to face the unbearable task of speaking with his family — telling them that he hadn’t been properly tied off, and that if he had been, he would still be alive.

To this day, that memory reminds me why fall protection rules matter. They aren’t just checkboxes for compliance — they’re the difference between going home at the end of the day or never seeing your family again.

Preventing Roofing Deaths: Best Practices

Roofing doesn’t have to be deadly. When safety rules are enforced, accidents plummet. Here are the key measures every contractor in Florida (and beyond) should follow:

  • Always tie off: No exceptions. Harnesses save lives.
  • Secure parapets and guardrails: Don’t leave gaps where workers can fall.
  • Plan around weather: Florida storms and gusts make crane work especially risky.
  • Inspect equipment daily: Harnesses, lanyards, and anchors wear out over time.
  • Supervision matters: Foremen and supers must enforce safety rules, even if it slows production.
  • Training new workers: Many accidents involve new or untrained roofers.

Florida contractors know OSHA will come down hard on violations — fines are steep, but the real cost is human life.

Different Perspectives

Some contractors argue that OSHA’s fall protection rules are too strict or slow down productivity. But the data says otherwise: companies with strong safety programs often see fewer delays and lower insurance costs (OSHA, 2023).

Others believe “experienced” roofers don’t need constant supervision. Unfortunately, experience doesn’t prevent accidents. In fact, seasoned workers sometimes cut corners because they feel invincible. The tragedy I witnessed in Puerto Rico was proof: a single missed safety step can turn deadly in seconds.

The bottom line: there’s no trade-off between safety and productivity. A dead worker stops the job longer than any safety harness ever will.

OSHA Fall Protection RequirementCommon Cause of Roofing Falls
Use of personal fall arrest systems (harness, lanyard, anchor point)Worker not tied off or harness not used correctly
Guardrails or safety nets at roof edges and openingsUnprotected parapet gaps or missing guardrails
Proper ladder use and secure footingLadders slipping or being used improperly
Training workers to recognize fall hazardsInexperienced or untrained workers on roof
Housekeeping – keeping roof surfaces clear of debrisLoose materials, clutter, or slippery surfaces

The Hidden Dangers of Cast Iron Plumbing in Old Florida Buildings

cast-iron-pipe-interior-scaling

Summary

Cast iron plumbing was once considered the gold standard in building construction. Today, in Florida’s aging high-rises and coastal properties, it’s a ticking time bomb. In this blog, I’ll explain how cast iron became so common, why it fails so badly in our climate, how professionals inspect it, and the options for repair or replacement. I’ll also share a real story from a 15-story building I inspected — a story that left the condo board both shocked and considerably lighter in the wallet.

The Origins of Cast Iron Plumbing

Cast iron pipes were first installed in American buildings as early as the 1800s. By the mid-20th century, they were everywhere — prized for their strength, fire resistance, and supposed longevity. Builders were convinced they would last 75–100 years.

That sounded great on paper. But the engineers and builders of 1950s Miami Beach weren’t counting on the brutal Florida environment: salty air, constant humidity, and rising groundwater. Add in the cleaning chemicals residents send down their drains, and those “lifetime” pipes often fail in less than 50 years (National Association of Home Builders, 2018).

The reality is this: cast iron is like the strong uncle at the family barbecue — looks tough, but put him in Florida heat and humidity for a few decades, and he’ll crumble faster than the potato salad left in the sun.

Why Cast Iron Fails So Badly in Florida

Rust is the enemy. When iron comes into contact with oxygen and water — and remember, in Florida, water is everywhere — it corrodes. Over time, rust eats away at the interior walls of the pipe, narrowing the flow, weakening the structure, and eventually creating holes.

And the symptoms? They’re as delightful as you’d expect:

  • Bad smells that no amount of air freshener can cover.
  • Slow drains that make you question whether your plunger is conspiring against you.
  • Leaks inside walls or ceilings, often discovered only after major damage has occurred.
  • Sewage backups — the kind that quickly ruin a kitchen remodel or, worse, a neighbor’s new white carpet.

In fact, a study by the International Association of Certified Home Inspectors (InterNACHI, 2021) noted that cast iron piping in humid regions like Florida may show “serious failure” in as little as 40 years. That’s a terrifyingly short lifespan for systems installed in the 1960s and 70s.

How Cast Iron Pipes Are Inspected

Inspecting cast iron is part science, part detective work. Here’s how it usually goes:

  1. Visual Inspections:
    Technicians look for visible leaks, staining on walls, or suspicious odors. Unfortunately, much of the piping in a high-rise is hidden, so visual checks only catch surface-level issues.
  2. Cameras:
    A small camera is sent through the pipes. Think of it like a colonoscopy for your building. This shows corrosion, cracks, and buildup on the inside walls of the pipes.
  3. Sounding Tests:
    Tapping along the pipe with a hammer can reveal hollow or thin spots. A healthy pipe rings like a bell. A rotten one thuds like a wet sponge.
  4. Moisture & Thermal Imaging:
    Advanced inspections may use infrared cameras to detect moisture behind walls, helping to pinpoint leaks before opening them up.

Repair Options: Lining vs. Replacement

Once you find failing cast iron, you have two main choices:

  • Pipe Lining:
    This method inserts a resin or epoxy liner inside the old pipe. It seals cracks and creates a smooth interior surface. It’s less disruptive but not always permanent. And if the original pipe is too far gone, lining won’t work.
  • Replacement with PVC:
    PVC (polyvinyl chloride) is today’s gold standard. It doesn’t rust, it resists chemicals, and it can last 100 years or more. The downside? Replacement often requires opening walls and ceilings, creating disruption and cost. But when done right, it eliminates the problem for good.

Many South Florida high-rises face the painful choice: spend less now with lining and risk future failures, or bite the bullet and replace everything with PVC. Boards that choose the “cheap fix” often call me back a few years later — usually when another surprise leak floods a unit.

True Story to Learn From

Let me take you to a 15-story condo on the coast of Fort Lauderdale. The call came in on a Tuesday morning: “Greg, we have a leak. No one can figure out where it’s coming from.”

Leaks are like ghosts. You hear them, you see the signs, but you can’t quite track them down. In this case, the unit owner had water stains on their ceiling, and the hallway smelled like something had crawled in the walls and died.

When I arrived, the board was frustrated — they’d already called a plumber who shrugged and said, “Could be anywhere.” That’s not what you want to hear when water is creeping into your drywall.

We brought in moisture meters, sniffed around like bloodhounds, and finally I told the board: “We’re going to have to open this up.” That’s always the part no one wants to hear, because it means drywall dust, angry tenants, and the sound of saws buzzing through walls.

Sure enough, when we cut open the wall around one of the plumbing risers, there it was: an entire section of cast iron pipe had completely rotted out. I’m talking a gaping hole you could practically put your hand through. The stench was overwhelming — years of sewage gases slowly escaping. No candle in the world could cover that up.

The board president turned pale. “How long has it been like this?” he asked. I told him, probably years — the pipe had been rusting from the inside out until it simply gave way.

The cost to fix it? Let’s just say it wasn’t pocket change. We had to replace the entire riser serving multiple units, which meant carefully opening walls up and down several floors. Tenants had to live with temporary plumbing outages and, yes, some colorful language was exchanged in the hallways.

By the time the job was done, the board had spent a small fortune. But at least they no longer had mysterious leaks and hallways that smelled like a sewer. The lesson? Ignoring cast iron plumbing doesn’t save money. It multiplies the bill later.

Different Perspectives

Some contractors argue that cast iron “can last 100 years” if properly maintained. While technically true in drier regions, Florida’s environment tells a different story. According to the Florida Department of Health (2020), cast iron here deteriorates far faster due to salt and humidity.

Others advocate for spot repairs only — patching leaks as they occur. The problem is, once one section fails, the rest is usually not far behind. It’s like fixing a flat tire on a car with bald tread — you’ll be back on the side of I-95 in no time.

That’s why most building engineers and plumbing experts now recommend comprehensive replacement with PVC, even though it’s disruptive. It’s the only long-term solution that avoids endless cycles of leaks and repairs.

AspectPipe LiningReplacement with PVC
DurabilityModerate – depends on condition of existing cast ironHigh – PVC resists corrosion and chemicals
DisruptionMinimal – no need to open walls extensivelyHigh – requires opening walls and ceilings
CostLower upfront costHigher upfront cost
SuitabilityBest for pipes with mild to moderate corrosionBest for pipes with severe corrosion or failure
Typical Lifespan10–20 years (depending on environment)50–100 years

Greg Batista speaks with Telemundo about the Baltimore Bridge Collapse

greg batista speaks with telemundo about balitmore bridge collapse-min

Greg Batista speaks with Telemundo about the Baltimore Bridge Collapse

Structural Engineer Greg Batista speaks about what could be the possible reason behind the Baltimore Bridge Collapse. 

Want to learn more about our services?

Greg Batista is an industry leader in Structural Engineering. His company AskGBatista specializes in Building Inspections, Building Repairs, as well as many other construction related services. If you would like to learn more about these services feel free to visit our services page or click the button below to get a quote. 

How an Owner’s Representative save you money

owners-representative-save-money
save money with owners represenative

How an Owner’s Representative save you money

You may think that hiring a structural engineer for your next construction project is going to cost you more money. It will! Hiring an owner’s rep in South Florida starts from $175 an hour which can accumulate over the timeline of your project. So how can you save money by hiring a professional engineer to oversee your next construction project? In this article, we will go over how it is possible to not only save thousands of dollars on your next construction project by hiring an owner’s rep but also how it will put you on the track to success and help you manage your budget efficiently. 

If you have been involved in any construction project or real estate development in South Florida for any number of years then you know that managing a project efficiently while staying within budget is often easier said than done. An Owner’s Representative can not only streamline your project but also save you money in the process.

Structural Engineer as an owners Rep

Structural Engineers have a comprehensive understanding of how buildings are constructed including the cost of materials, when and where to use a specific material, as well as how everything comes together. Hiring an owner’s representative, also referred to as an owner’s agent will add a crucial member to your team that understands the construction project and can get your project done efficianetly. How does this save you money? Well, as we all know time is money and the longer it takes to get your project completed the more workers required on site and the longer it will take to start to gain income from renting out the units of the property. The owners rep oversees the entire project and can be used at any stage of your construction project. Whether you hire an owners rep at the start of your project or towards the end of your project, they will ensure the project goes smoothly.

What are change orders

Change orders are common in construction projects. A Change order is when an area that is completed needs to be removed or changed to something different. Construction projects are dynamic and are always changing based on the owner’s or developers’ requirements. This can be due to style changes recommended by an architect or engineer or due to a mistake created by the contractor. Not all contractors are created equal and you might find that what was originally designed was not what you receive. These change orders can be a couple of thousand dollars or can cost millions of dollars depending on the size of the project and the scope of the change order. 

If the contractor does not follow the engineering plans to the tee then when the city building inspector arrives to check your project they may pause your project and require you to get new plans or in a worst-case scenario require you to redo the area in question completely. As you can see having an Owners Representative overlooking your project will keep change orders to a minimum and potentially save you thousands of dollars or millions if it is a larger scale project. 

Strategic Planning and Budgeting

Budget management is crucial to any construction project if you want to stay within a current cost. When you have investors or additional stakeholders on larger projects budget projections are even more essential to calculating the return on investment and scheduled time frame for completion. Owners’ representatives work in conjunction with the project managers and general contractors to figure out budgets, track expenses, and implement cost-saving measures without compromising quality or safety.

One of the primary roles of an Owner’s Representative is to develop a comprehensive project plan and budget. By leveraging their expertise in construction and project management, they can accurately forecast costs, identify potential risks, and establish realistic budgets from the outset. This proactive approach minimizes the likelihood of budget overruns and unexpected expenses down the line such as the change orders we discussed above

Selecting VENDORS and Negotiating costs

Having an owner’s representative on your construction project brings incredible value to the owner in several ways. For example one of the roles of the Owners Rep is to select which vendors will work on your project and negotiate pricing on your behalf. An experienced Owners Representative will bring with him a host of knowledge such as what vendors are credible and what the cost of hiring these vendors will be. 

Our team has several Owners Reps in-house who have a wealth of knowledge and most importantly experience working with many vendors across South Florida. This will save you from hiring Vendors who are not qualified to handle your construction project leading to delays in completion as well as costing you money. We have worked with many vendors across South Florida and can recommend some of Florida’s best teams to work on your project. 

Risk Management and Problem Solving

Despite careful planning of a project, unexpected challenges can arise during a construction project. Many problems can affect a construction project that is out of the control of the building owners or even the Owner’s Representative. The difference is that when you hire an Owners Representative they have experience with these issues and are well-equipped to handle these unforeseen circumstances, employing their problem-solving skills and industry experience to minimize your risks and find creative solutions that will save you money. 

Whether it’s navigating City regulations, resolving conflicts with permits, changing materials used, or addressing construction delays, they are invaluable in minimizing disruptions which will save you money and keep the project on track. With an owner’s rep by your side, you will minimize your risk and have a technical expert who can find you the best alternatives to keep your project going. 

Optimizing Efficiency

Everyone in the construction industry knows that a well optimized plans will save you money. By implementing best practices and leveraging technology, an Owner’s Representative can optimize efficiency and streamline processes throughout the lifecycle of your construction project. From project scheduling and resource allocation to procurement and logistics management, they identify opportunities for improvement and implement strategies to enhance productivity and minimize waste. This focus on efficiency not only accelerates project timelines but also reduces costs associated with inefficiencies and delays.

Final thoughts

As you can see hiring an Owners Representative will add an additional expense to your pay role but will also save you time and money on your next project. Their construction experience and expertise will allow you to complete your project on time and within your budget. From managing and negotiating with your vendors to reviewing plans and minimizing change orders you will save a ton of money when you hire a qualified Owners Representative. 

We would be happy to serve as your Owners Rep and bring a wealth of knowledge to your next construction endeavor. Our team is standing by to help you manage your project and ensure everything goes according to plan. We have served as owner representatives for many South Florida building owners and will be happy to help you too. 

North Miami Building Inspections: A Step-by-Step Guide

north miami building recertification guide
North Miami Building recertification guide

North Miami Building Inspections: A Step-by-Step Guide

North Miami has made some changes to its 40-year inspection program in accordance with the new Senate Bill 4-D. Although the North Miami 40-year inspection program was very comprehensive, there are some new changes to the building inspection program you won’t want to miss. If you are a building owner, association, building manager, or property manager in North Miami then stay tuned for a comprehensive guide about the new changes. 

In this article we will go through everything you need to know about the new North Miami Building Safety Inspection Program, so you can stay in the loop and make sure you are ready and knowledgeable when the time comes to complete your next inspection. As structural engineers, we are one of the best building inspectors for the job. Our extensive knowledge and expertise in the recertification process allow us to complete your building inspections right the first time. 

We have also listed the contact information for the North Miami Building Department below if there were any questions that we did not discuss here. North Miami building department inspections are crucial to the safety of residents and surrounding areas. Click the link below and we will give you a quote for your next building inspection within 24 hours. 

north-miami-building-department

NORTH MIAMI BUILDING DEPARTMENT

12340 NE 8th Avenue North Miami, FL 33161

305-893-6511 Ext. 18007

[email protected]

Hours

7:30am-5:00pm M-F

Why did the North Miami Building recertification program change?

In the aftermath of the tragic Surfside condominium collapse in June 2021, claiming numerous lives, Florida’s senate responded swiftly by implementing new building safety inspection guidelines. However, it’s worth noting that North Miami already instituted many of these requirements with the 40-year inspection. 

While some alterations were made regarding inspection frequency, it’s crucial to highlight that the Miami-Dade Building recertification/inspection program was already aligned with, and in some cases exceeded, the mandates of the new statewide program. 

These new changes were crucial to ensure that buildings in North Miami are maintained and do not pose a safety risk for residents and the surrounding neighborhood. North Miami building department inspections can be complicated but we are here to walk you through the process. 

I already completed the North Miami 40 year recertification now what?

If you have already completed The North Miami’s 40-year recertification then you are already ahead of the curve. The requirements for the new Building Safety Inspection program remain the same except for an additional inspection called the Structural Integrity Reserve Study. The requirements of the inspection remain the same as far as the components that need to be inspected. This includes the previous structural inspection and electrical inspection along with the parking lot illumination and guard rail inspection if applicable to your building. 

If your building does not have a parking lot attached you won’t need to worry about the guard rail and illumination inspection. However, you will need to continue with the subsequent inspections that are required every 10 years after your building’s first inspection. The most important change you will need to start considering is the new Structural Integrity Reserve Study also known as the SIRS Study. 

The SIRS Study is a new visual inspection that analyzes your building’s current condition and calculates the estimated funds required to maintain and repair your building. The SIRS study must be performed by a qualified Building Inspector just like the Building Safety inspection. This means they must be licensed engineers or architects to serve as your building inspectors for these inspections. 

What is inspected during the North Miami Building Safety inspections?

There are two major areas that the North Miami building Safety Inspection focuses on. That is the structural components of your building and the electrical components. Each of these elements is crucial to the safety of your building and the surrounding areas. Out of these two components, the structural portion is essential because it is the backbone of your building and is what keeps it standing. 

The structural inspection portion of the North Miami building inspection program looks at several key structural elements of your building. Let’s go over some of the structural components of your building that are inspected during the inspection process. First and foremost are the load-bearing elements such as load-bearing walls and columns. If these components fail then it can cause a collapse of the structure. Along with these two key structural elements, the North Miami Building inspector carrying out the inspections will also examine areas around doors and windows and look for signs of cracking or concrete spalling. Any steel, wood, or concrete framing systems are also inspected to make sure they are in good condition.

In the electrical portion of the building safety inspection, the building inspector will look at your exterior electrical panels and conduits. If you own an older building and have metal conduits then the building inspector will look for corrosion around the pipes and panels. They will also check for any holes or damage on the panels. For example, if your panel has an exposed hole such as those from knockouts that were not used in the final setup of the electrical system. The building inspector will also look at your fire safety system to see if it is tied into the building’s electrical system. 

If you have a parking lot attached to your building the building inspector will also need to do a parking lot illumination and guard rail inspection. The parking lot illumination inspection examines the light output of your parking lot’s lighting system and determines whether it is sufficient to avoid any accidents due to low lighting conditions. The guard rail inspection ensures you have the proper guard rails installed and if they are installed they will check if they are in good condition and are not bent or corroded. 

Now you also want to pay attention to your building location because the new Building Safety Inspection affects the time frame when you will be required to complete your first inspection. If your building is within 3 miles of the coast your building recertification inspection is required when your building reaches 25 years. However, if your building is more than 3 miles from the coast then you have an additional 5 years to plan for your inspection, as your first inspection will not be required till your building reaches 30 years of age. 

Subsequent inspections will be required every 10 years after whether you completed the North Miami 40-year inspection or the new Building Safety Inspection. 

How do I know if I need a recertification for my building in North MIami?

If you’re wondering whether your building in North Miami requires an inspection, stay tuned as we delve into the details. Although the new Senate bill will affect many condo inspections in North Miami, condominiums are not the only buildings that require the new building safety inspection. If you own a building or are a property management company in North Miami you will want to continue reading. 

Any building or structure that is three stories or taller and has 3,500 square feet or more is required to complete the building safety inspection as well as the North Miami SIRS study inspection.

What buildings in North Miami are exempt from the Building Safety inspection?

Not all buildings in North Miami are required to complete a building safety inspection. Notably, these buildings include U.S. government buildings, state of Florida buildings, Indian reservations, North Miami School Buildings under the Dade County school board, one or two-story buildings, townhouses, and minor structures that are under 3500 sq ft.

How to submit your North Miami Building Dept inspections?

Once a qualified building inspector has examined your building and completed the inspection report they will sign and seal the report. This signed and sealed report will be sent to you and then you can submit this inspection to the North Miami Building Department for approval. We have a 100 success rate in these inspections. Our building inspectors are also structural engineers with comprehensive knowledge of the composition of your building’s structural components. 

If the building inspector did not find any issues with your building during the inspection you can submit the clean report to the North Miami building department and you are not required to complete this inspection again for another 10 years. However, if the inspector found any problems with your structural components or electrical system then you are still required to submit the report. 

Although now you will have to go and fix all of these issues the upside is that the North Miami will give you an extension so that you can pull the permits required to complete these repairs. It is crucial to get your signed and sealed report to the North Miami building department as soon as possible to avoid any fees or penalties. 

Summary of the North Miami Building inspection program

In this article, we looked at what the new changes to the 40-year inspection were made and how the new Building Safety Inspection program will affect condo owners in North Miami. To summarize everything in this article, the main change to the previous building inspection program is the date when you will need to complete your first inspection. If your building is located in North Miami and is 3 miles or less from the coast your first inspection is due after 25 years. For buildings in North Miami that are more than 3 miles from the coast, your first inspection is due after 30 years. 

The next major change was the addition of the North Miami SIRS Study. Besides those two changes not much else has been changed. Due to how comprehensive the previous inspection program was it already covered and exceeded the requirements outlined in the new Senate Bill 4-D. It is crucial to get started on your building inspection as soon as you receive the certified letter from the North Miami Building department. 

When you hire us as your North Miami building inspector you can rest assured you are in good hands. We handle everything for you and will ensure your building safety inspection gets completed properly and you don’t have any issues. Our team of building inspectors is experienced and knowledgeable about the North Miami building inspections and we’ll ensure your inspection gets done properly. 

What are the new Florida condo laws in 2024?

new florida condo laws
new florida condo inspection laws in 2024

What are the new Florida condo laws in 2024?

Florida’s condominium market is renowned for its beautiful properties and diverse communities, but ensuring the safety and quality of these buildings is crucial for the safety of residents who reside in the building as well as the safety of the surrounding areas.

In response to growing concerns about building integrity and safety standards after the collapse of the Champlain Towers in Surfside, Florida has enacted new condominium laws aimed at strengthening building inspection requirements across the state.

This article will review the new laws found in the Florida Senate Bill 4D (SB 4-D), Florida Senate Bill 154 (SB 154), Florida Condominium Act (Chapter 718, Florida Statutes), Florida Cooperative Act (Chapter 719, Florida Statutes). These laws, while posing some challenges, are ultimately a public safety program that prioritizes the well-being and security of residents and visitors alike. These laws provide a legal framework governing milestone inspections and structural integrity reserve studies. 

At AskGBatista.com we have extensive experience in Building Recertifications and can assist you with any questions you might have. You can use the button below to get in touch with us and get a quote for a Milestone Inspection or a Structural Integrity Reserve Study.

Florida Senate Bill 4-D: Milestone Inspections

What is Senate Bill 4-D and how will it affect condo associations? After the tragedy that occurred in Surfside with Ninety-eight people passing in the Champlain tower collapse, Florida decided that the current Building inspection procedures needed to be reformed to prevent something like this from happening again. 

Introducing Senate Bill 4-D, a new bill that was put into effect on 5/26/2022 and was implemented throughout the state of Florida. The Bill introduced new requirements for roofing systems which we will not discuss in this article, but instead, we will go over the new requirements found in the Bill pertaining to Building Inspections. 

The second part of the Bill provides new building safety inspection requirements that require condominium associations and cooperative associations to have milestone inspections performed on certain buildings during specified intervals. The new Bill allowed local building enforcement agencies to determine specific timelines and penalties relating to milestone inspections. 

The new condo laws also known as Milestone Inspections were split up into two parts. There is a Phase 1 of the Milestone Inspection and a Phase 2 of the Milestone Inspection. We will elaborate on the specifications of each phase below. In this article when we refer to a Building Inspector we are referring to a Building Inspector who is qualified to complete these inspections whether it is a licensed engineer or licensed architect. You can visit our Milestone Inspection page for additional info or to get a quote.

Phase one of Milestone Inspection

According to the first Phase of the Milestone inspection, building owners should receive a certified letter in the mail making them aware that their first milestone inspection is due. Once the Association receives this letter they are required to complete the Phase 1 Milestone inspection and submit a signed sealed report by a Florida licensed engineer or architect within 180 days of receiving the certified letter.

Phase-One Milestone inspection requires a visual inspection of the structural members and systems to ensure they are structurally sound and the Building is safe for use. This includes both the habitable and non-habitable areas of the building. In the inspection, the Engineer or Architect will visually inspect and identify any areas of the building’s structural components that have deteriorated and may pose a risk to residents.

In the visual inspection report, the Building Inspector will provide a qualitative assessment to determine if any of the structural elements require further inspection and require repair, maintenance, or replacement. This initial inspection is solely a visual inspection and does not require any destructive testing or invasive testing methods. 

If the Building Inspector does not find any structural deterioration in the first phase of the Milestone Inspection then the second Phase of the Milestone Inspection is not required. However, if the inspector finds any structural issues then you will be required to complete the second phase. After the Phase One report is completed the Building Inspector will provide you with a signed and sealed report outlining the details of the Phase One inspection and the report must be submitted to the local building department. 

Phase two of Milestone Inspection

If any issues are discovered during the Phase-One Milestone inspection by the building inspector, the process necessitates completion of the second phase. This subsequent phase entails a more comprehensive examination, which may involve either destructive or non-destructive testing methods. In the event that the Phase 2 Milestone inspection report is mandated, a progress report must be promptly submitted to the local building department, detailing a timeline for the completion of the second phase.

The extent of exposure required in the surrounding area for a thorough inspection is at the discretion of the Building Inspector. This may entail the removal of concrete around problematic areas to uncover underlying issues necessitating attention. During the second phase of the Milestone Inspection, the Building Inspector must prioritize testing locations that cause minimal disruption and are easily repairable, while still providing an accurate assessment of the building’s structural issues.

Once the engineer has thoroughly assessed the damage, they will furnish a report outlining a recommended action plan to address problematic areas and repair distressed sections of the building. Regardless of whether the second phase is deemed necessary, a signed and sealed report by a qualified Building Inspector must be submitted to the local building department.

This report should detail the inspection methods employed and identify any structural deterioration observed. The extent of the deterioration should be described, along with recommended repairs to rectify the issues. Furthermore, the Inspector must indicate whether any dangerous or unsafe conditions, as defined in the Florida Building Code, are present. Additionally, the Inspector should recommend any preventive repair measures for damaged areas lacking substantial structural deterioration. Finally, any issues requiring further inspection must be identified and described in the report.

Once the Association has submitted the second phase of the Milestone Inspection to the Building Department they must submit proof to the local Building department that repairs have been scheduled or started within at least 365 days after the Phase 2 Inspection report is approved by the local building department. If the building department does not receive proof that the repairs have not been scheduled or started within that time frame the local building department may review whether they deem the building unsafe for occupancy.

Buildings affected by the new condo laws

According to the new Senate Bill 4-D, any building that is three or more stories is required to complete a Milestone Inspection of a building’s structural integrity. This Milestone Inspection must be performed by a licensed Engineer or Architect when a building reaches a certain age. If the building is located more than 3 miles from the coast then the Milestone Inspection must be completed after the building reaches 30 years of age. However, if the building is located 3 miles or less from the coast then the Milestone Inspection must be completed after 25 years of age. This is a state-wide mandate meaning that all buildings in Florida are required to complete these Milestone Inspections. 

Buildings built on or before July 1,1992

If your building meets the requirements above and you are required to complete the Milestone Inspection, and the Building’s certificate of occupancy was issued on or before July 1, 1992, then the first Milestone Inspection must be completed by December 31, 2024.

Sb-4D provides Increased rights for unit owners

he newly enacted Senate Bill 4-D has significantly bolstered the rights of both owners and renters by granting them access to milestone inspection reports as well as other critical documents like the SIRS study or Building Safety Inspection reports. This pivotal change empowers owners and renters alike with valuable insights into the condition of the building, enabling them to make informed decisions regarding their living arrangements.

Furthermore, in the event that a Director or Officer of an association knowingly and willingly opts not to conduct the Milestone Inspection, they are in direct violation of their fiduciary duty to unit owners, constituting a serious breach of trust and responsibility. Included in the new condo inspection laws the SB-4D also extends the jurisdiction of the division to investigate complaints, including complaints related to the procedures used to complete the Milestone Inspection. 

Florida Building Commission requirements

Under the new condominium regulations, the Florida Building Commission is mandated to provide recommendations to both the governor and legislature concerning inspection mandates within the legislation. This encompasses not only condominiums but also extends to various other types of structures and buildings standing at a height of three stories or more.

New requirements for developers

Although the Milestone Inspection is mostly required to be completed once a building reaches 30 years or 25 years there is another case where a Milestone inspection is warranted. For example when a developer is performing a turnover inspection they must also provide a Milestone Inspection report along with the Turnover inspection. 

New Requirements for Associations

According to the new requirements outlined in the Senate Bill 4-D associations are required to report the number of buildings that are three stories or higher as well as the number of units in each building. They must be submitted to the Florida Division of Condominiums, Timeshare Division, and Mobile Homes Division before January 1, 2022. 

Requirements for Condo sales

Whether the units are owned by a developer or not all unit owners are required to provide a copy of the Milestone Inspection report summary completed by the Building Inspector to potential buyers. 

Why is the Milestone Inspection important

Milestone inspections encompass everything from initial construction to periodic evaluations and significant renovations. They are essential to maintaining the structural integrity of your property. These inspections allow building owners, associations, and property managers to identify problems in your building early, assuring compliance with legal responsibilities, and giving residents peace of mind that the building is safe.

The structural Integrity Reserve Study

The new condo laws also introduced the SIRS study outlined in Florida Administrative Code (FAC) Rule 61B-22.005. The Structural Integrity Reserve Study or SIRS Study for short is a new visual inspection that pertains to the funding of reserves for repairing and maintaining a condominium and any cooperative buildings. Just like the Milestone Inspection, the SIRS study must also be completed by a licensed Engineer or Architect. The SIRS study introduces a variety of requirements that will be discussed further. You can visit our Structural Integrity Reserve Study page for additional info or to get a quote.

What is Florida Senate Bill 154?

The legislative adjustments brought forth by SB 154 have notably reshaped the landscape of condo reserve studies in Florida, introducing the Structural Integrity Reserve Studies (SIRS, 718.112(2)(g)). Prior to May 2022, reserve studies were recommended but voluntary, lacking the need for professional oversight. However, with the advent of SIRS, these studies now encompass a comprehensive list of ten components, ranging from load-bearing walls to plumbing and electrical systems. This inclusive approach aims to ensure the structural integrity of buildings by addressing crucial elements that could potentially impact other aspects if left unattended.

What is the sIRS Study?

The Structural Integrity Reserve Study also known as the SIRS study is defined by the new condo laws as a study of the reserve funds required required for future major repairs and replacement of the common elements based on a visual inspection of the common elements. In summary, it is a Visual Inspection performed by a licensed Engineer or architect that outlines how much it would cost to repair and maintain your building over the next 10 years. The purpose of the SIRS study is to ensure that associations have the funds available in reserve when these repairs are required. 

What is inspected during the SIRS study?

The SIRS study calculates the estimated remaining life and estimated replacement cost of several crucial areas of a condominium. These areas include the roof, load-bearing walls, other structural members of the building, floor, foundation, fireproofing, fire proofing systems, fire protection systems, plumbing system, as well as any item with a deferred maintenance or repair cost that exceeds $10,000.

must be completed every 10 years

The SIRS study requires condominium associations and cooperative associations to complete a SIRS study every 10 years for any buildings that are 3 stories or higher. Any associations that were created on or before July 1, 2022, that are not controlled by a developer are to be completed by December 31st, 2024.

Sirs study for developers

Developers are now required to complete a SIRS study for each building in the association that is three stories or more prior to handing over control of the association to non-developer unit owners.  

ASsociations SIRS study requirements

If an association fails to complete a structural integrity reserve study it is a breach of a board member or officer’s fiduciary duty. This can result in personal lawsuits or even criminal charges due to negligence. This was implemented in order to ensure that board members take personal responsibility to complete these inspections that can prevent accidents such as the one that occurred at the Champlain Towers Building in Surfside.

Why is the Structural Integrity Reserve Study Important

As a Building Owner, Property Manager, Condominium Association, or Cooperative in Florida, you know how difficult it can be to maintain and manage a building. The SIRS study plays a crucial role in helping to preserve your property’s value, safety, and longevity. The SIRS is not solely a legal obligation but a great way to understand the condition of your building and what it will cost you to keep everything up to date and in working order.

How do these new laws affect South Florida

If you are familiar with South Florida’s previous 40-year inspection then the Milestone Inspection requirements will seem familiar. That is because South Florida’s 40-year inspection program has been in place since 2005. This 40-year inspection program was implemented by Miami-Dade, Broward County, as well as Palm Beach County. The program was a comprehensive inspection program that covered more than just the Milestone Inspection requirements. 

Due to how comprehensive this program was, it was only adjusted to fulfill some extra requirements introduced in the new Milestone Inspection program. Mainly the due date for a building’s initial inspection. Instead of requiring your first Building Inspection after 40 years, the timeframe was reduced to every 30 years or every 25 years.

Based on the requirements outlined in the Senate Bill 4-D if your building is located more than 3 miles from the coast it is required after 30 years. However, if your building is located 3 miles or less from the coast your first inspection will be required after 25 years.  Some counties such as Broward County are requiring all buildings regardless of their proximity to the coast to complete the inspection after 25 years. 

We always recommend referring back to the SB-4D bill or reaching out to your local building department in order to verify when your first building inspection is due.  

Besides the initial inspection date South Florida’s Building Safety Inspection program already meets and exceeds the requirements found in the new Milestone Inspection. For example, Broward County, Miami-Dade, and Palm Beach require not only a structural inspection but also an inspection of your Building’s electrical system. 

In addition to the structural and electrical inspections found in the Building Safety Inspection program, some counties such as Miami Dade require a parking lot illumination inspection along with a Guard rail inspection. These inspections are only required if your building has a parking lot attached to it. 

How do these new laws affect South Florida

Overall the new Florida Inspection Laws will have a huge effect on condominiums across Florida. These new condo inspections must be completed by a licensed Engineer or architect. The newly introduced SB-4D bill now requires all Buildings across Florida that are three stories or more to complete a Milestone Inspection. 

It also introduced the SIRS study which is an additional visual inspection that provides an estimated cost to repair and maintain your building by looking at key structural elements. This provides associations and condo owners with a brief understanding of the condition of the building and allows associations to have the funds in reserve when these major repairs are required.

We are qualified to provide you with both the Milestone Inspection and the Structural Integrity Reserve Study. With over 100 years of combined experience our engineers are happy to help you through the process and answer any questions you might have regarding the SIRS study and Milestone Inspection. We can provide you with a SIRS study quote or Milestone inspection quote within 24 hours.